Table of Contents
Step by step to use printf() and scanf() in STM32CubeIDE with Nucleo-L152RE board.
1 STM32CubeIDE installation
Refer to UM2563 - STM32CubeIDE installation guide.
2 Create a new STM32 project
In STM32CubeIDE menu, click File | New | STM32 Project.

In Target Selection window,
- Browse to Board Selector tab
Enter "Nucleo-L152RE" in Commercial Part Number textbox to filter it from the Boards List- Select the board and click Next button

A Setup STM32 project window will pop up. Provide a project name such as "nucleo-io" and click Finish button.

Another window Board Project Options will pop up. Select Yes to initialize all peripherals with their default Mode.

Then, STM32L152RE pinout will be configured according to Nucleo-L152RE. In this tutorial, we are going to play with LD2 / Green LED (PA5) and USART2 (PA2, PA3).

3 Start programming
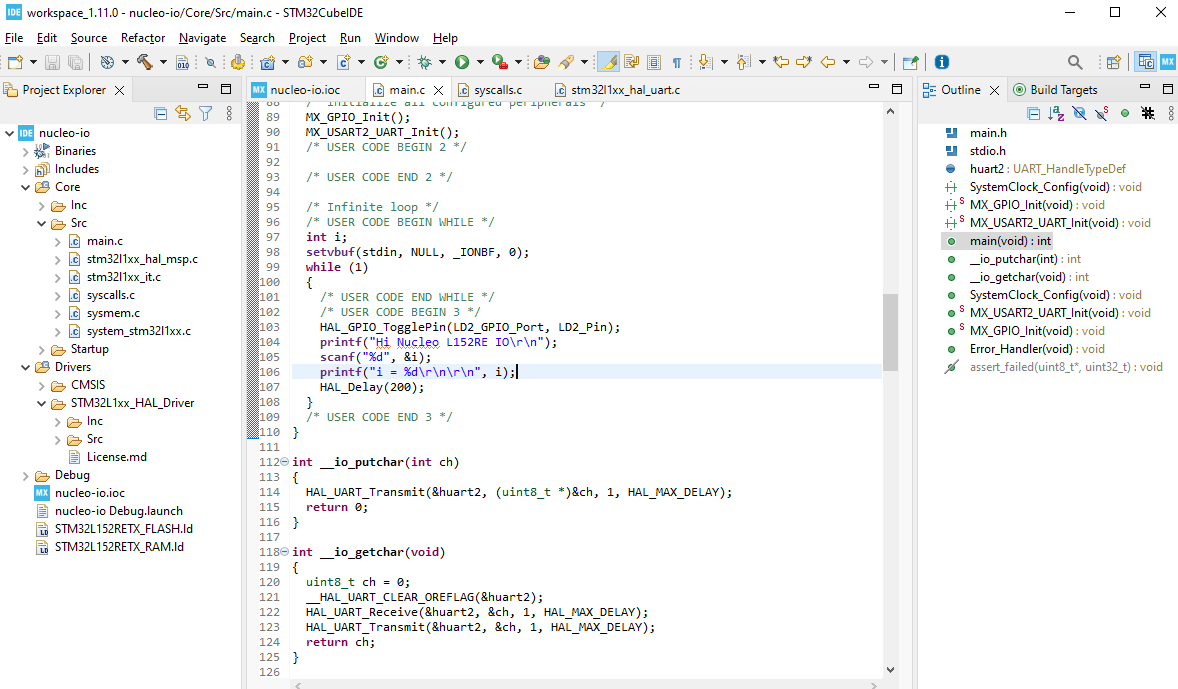
In Project Explorer, browse to nucleo-io project | Core | Src | main.c - double click to open.
STM32CubeIDE automatically generated codes shall have initialized all the configured Nucleo-L152RE peripherals, in MX_GPIO_Init(); and MX_USART2_UART_Init();.
We add to toggle the Green LED, print something and scan an integer in the main loop.
int main()
{
    ...
    int i;
    setvbuf(stdin, NULL, _IONBF, 0);
    while (1)
    {
        /* USER CODE BEGIN 3 */
        HAL_GPIO_TogglePin(GPIOA, GPIO_PIN_5);
        printf("hello\r\n");
        scanf("%d", &i);
        printf("i %d\r\n", i);
        HAL_Delay(1000);

    }
/* USER CODE END 3 */
}
Note that output gets fluashed on the reaching newline character or calling fflush(stdout). We print newlines here.
Alternately, we can use setbuf(stdout, NULL) to set a null buffer behind stdout, which in effect un-buffer the writings, without needing to flush. We do similarly to stdin, to call setvbuf(stdin, NULL, _IONBF, 0)
By default STM32CubeIDE generates a syscalls.c implmented with minimal system calls. It includes _write() and _read() that we are to use to print to and scan from the standard IO.
We implement __io_putchar() and __io_putchar() to replace the weak functions in syscalls.c.
int __io_putchar(int ch)
{
    HAL_UART_Transmit(&huart2, (uint8_t *)&ch, 1, HAL_MAX_DELAY);
    return ch;
}

int __io_getchar(void)
{
    uint8_t ch;
    __HAL_UART_CLEAR_OREFLAG(&huart2);
    HAL_UART_Receive(&huart2, &ch, 1, HAL_MAX_DELAY);
    HAL_UART_Transmit(&huart2, &ch, 1, HAL_MAX_DELAY);
    return ch;
}
We use the very basic polling method for UART transmitting and receiving.
In __io_getchar(), we clear the overrun flag before receiving, then receive a character on UART2 and echo the character back.
The whole main.c in STM32CubeIDE looks like the following.
4 Run and debug
Build the project with clicking menu | Project | Build All. The ELF is correctly built.

Program STM32 and run the application by clicking Run button.

Open a Command Shell Console in STM32CubeIDE under Console tab. Or start a terminal application, such as TeraTerm, PuTty, KiTTY, SmarTTY, SST.
Configure the serial port connection to the corresponding virtual COM port with default settings - 115200 8N1.
We will be able to see the Green LED being toggled on the board, output being printed to the terminal, and input waiting to be entered.

USART input and output of STM32L152RE is directed to the vitual COM port, that is enumerated by the ST-Link on the Nucleo board. I.e. the Nucleo on-board ST-Link serves as a UART to USB converter.
5 References
- STMicroelectronics
- STM32CubeIDE - Integrated Development Environment for STM32
- UM2609 - STM32CubeIDE user guide
- NUCLEO-L152RE - STM32 Nucleo-64 development board with STM32L152RE MCU, supports Arduino and ST morpho connectivity
- STM32L152RE - Ultra-low-power Arm Cortex-M3 MCU with 512 Kbytes of Flash memory, 32 MHz CPU, USB, 2xOp-amp
- PM0056 - STM32F10xxx/20xxx/21xxx/L1xxxx Cortex®-M3 programming manual
- cppreference
- How to redirect the printf function to a UART for debug messages
- How to Use printf on STM32
- How To Receive UART Serial Data
- STM32 tutorial: Efficiently receive UART data using DMA
- Microcontroller Embedded C Programming Lecture 66| Scanf exercise implementation

No comments:
Post a Comment